Today I keep staring at my children and wondering how the dear people in Newtown, Connecticut are feeling--how are they dealing with their hurt during this holiday season. And I'm asking myself how I can answer the question that my 9yo asked me, "Why would someone do that?"
It is all so senseless and tragic and because I don't have words to explain away the hurt, I've encouraged my family to pray.
This image is being passed around the web to honor those women and children who died.
Monday, December 17, 2012
Wednesday, December 12, 2012
Cincinnati Chili
Kate here again with another recipe. This dish goes together quickly and then simmers for an hour. This recipe comes to me from my brother-in-law, Paul. He served his mission in Kentucky and Ohio and brought back this recipe. It quickly became a family favorite. My daughter requested it for her birthday dinner this year. So let's get started.
First, you'll need1 ½
lbs. ground beef.
Next, throw in one chopped onion and one minced garlic clove and brown together.
Then you'll need 3 15-ounce cans tomato sauce, 1 T. vinegar, and 1 T. Worcestershire sauce. Pour those ingredients into the pan with the browned ground beef, onion, and garlic.
Next you'll add a slew of spices:
½ tsp.
salt
1
tsp. cumin
1
tsp. allspice
1
tsp. ground cinnamon
1
tsp. red pepper
1
tsp coca
1 T.
chili powder
Stir everything together and bring to a boil.
Reduce heat to low and simmer for one hour.
Serve over angel hair pasta. Garnish with grated cheese and oyster crackers if desired. Enjoy!
Cincinnati
Chili
1 ½
lbs. ground beef
1
large onion, chopped
1
garlic clove, minced
½ tsp.
salt
1
tsp. cumin
1
tsp. allspice
1
tsp. ground cinnamon
1
tsp. red pepper
1
tsp coca
1 T.
chili powder
1
T. vinegar
1
T. Worcestershire sauce
3
15-ounce cans tomato sauce
Kate is the author of The Guy Next Door and can be found at KatrinaPalmer.com or on FB at KatePalmerAuthor.
Wednesday, December 5, 2012
Christmas Gift Card Holder
Hi Mashed Potatoes and Crafts friends!
Kristie here today from Kristie Kreates.
It's the first Wednesday of the month, so I'm here with a tutorial.
Today I'm going to show you how to make a cute
Christmas Gift Card Holder.
Just about everyone gives someone a gift card at Christmas,
so why not give it in style?!?!
And this holder can be done with whatever paper you want,
so it can be made for a birthday, a thank you gift or anything you like.
Now let's get started.
To start you will need a piece of card stock measuring
7" x 4 3/4"
Along the 7" side you will score at 1/2" and 3 3/4"
Trim off the corners as shown above.
With a circle punch, punch a half circle in one of the 3" sides.
This will be the top back of the envelope.
Add strong adhesive, I like double sided tape, to the side and bottom of the envelope. Fold the 1/2" area to the inside of the card, remove the backing of the double sided tape and stick together making an envelope.
Round all corners.
Now you have your envelope.
You will now need a coordination piece of paper or card stock
measuring 4 1/2" x 3".
Round all corners and wrap ribbon, embroidery floss or baker's twine around this piece and tie in a bow.
You can use whatever you'd like.
This piece will be adhered to the front of the envelope.
Now you will need a piece of the coordinating paper that measures
6" x 2 3/4"
Score this piece at 1 1/2" and 2 1/2"
Now fold it to look like this.
Using which ever adhesive you like, adhere
the bottom flaps together like above.
Using a very narrow bit of adhesive along the sides of the flap
adhere it to make a small pocket where you will place your gift card.
Just be sure you adhere only along the edges, so the gift card will fit.
Then adhere this to a piece of card stock that measures
3" x 4 1/4"
This makes the insert that will be inside the envelope.
Now you have a beautiful gift card holder
that anyone would love to receive.
I hope you have enjoyed this tutorial
and will make some of these gift card holders
for the holidays, or whenever you may be giving a gift card.
Just use your imagination and creativity
to create something wonderful to give a loved one.
Leave a comment and let me know what you think, or
if you have a question, feel free to ask
and I will get back to you asap.
I'd love to hear how your holder turned out.
I'd also love it if you'd stop by my blog
and see what else I've been creating lately.
Have a wonderful Christmas
and I will "see" you in the new year
with some more creative fun.
Thursday, November 22, 2012
Happy Thanksgiving
A couple weeks ago, my family was battling the terrible flu bug, so we all stayed home from church. That afternoon, the kids were getting restless so we decided to make some turkeys, using our hands as patterns.
My favorite was my nine-year-old daughter's hilarious perception of Thanksgiving--check it out, from the Turkey's Point of View.
We hung everyone's pictures up on the wall for some Thanksgiving cheer.
We're so thankful for our family, our friends, a warm home, and plenty of good food.
We hope that you have a super smashing Thanksgiving and that you eat plenty of mashed potatoes!
Wednesday, November 21, 2012
Thanksiving Turkey Hair Bow
Hi! My name is Brave Brooke and I blog over at Wayward Girls Crafts with my three sisters and mom. We have high hopes for crafts that don't always turn out perfect. I have an 18 month old little girl and last year for her first Thanksgiving I made her a cute turkey bow. We're in the "no bow is a good bow" stage with her and most of the time they are discarded within 30 seconds so I'm not sure I'll be able to get her to wear it this year!
Thanksgiving Bow:
Needed:
Ribbons (I used pink, yellow, and orange. 3.5" of the pink and 12" of the orange and yellow)
Stiff Interfacing
Brown Fabric (you could replace the interfacing and brown fabric with stiff brown felt)
Fabric Paint (white, black and red)
Small orange felt beak
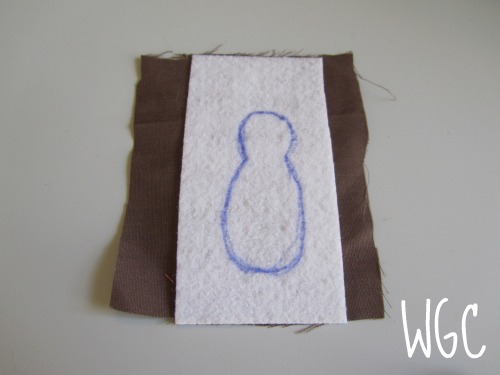
1. I cut out the shape of the turkey body out of interfacing. I cut the fabric just bigger than the body and glued it on the front. I then cut slits around the edge of the body so it would lay flat while I glued it around the edge.
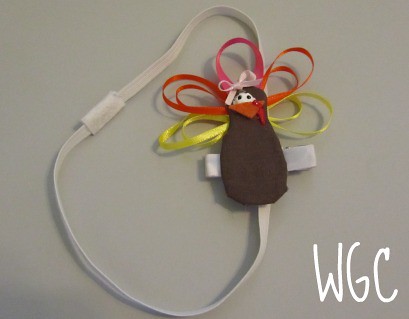
 2. I cut the ribbon in pink 3.5" x1, orange 3.5" x2 and 2.5" x2, and yellow 3.5" x2 and 2.5" x2 lengths. I looped them and hot glued them.
3. I glued them onto the back of the turkey with the small loops in the middle of the large loops.
4. I glued on the small orange beak, made a waddle with red paint and the eyes with white and black paint. I made a loop with the interfacing on the back so it can be put on the interchangeable clip and onto a headband because she still doesn't have anything more than a fuzzy head :)
After all this I smeared the eye so I put a bow on the Turkey because she's a girl.
Here is her whole Thanksgiving Day outfit: Isn't she a cutie!? Her onesie is courtesy of her Aunt Jaime. My daughter was being a total stinker and wasn't smiling.
I have some more bow tutorials found here. We would love to have you stop by and say hello!
Monday, November 19, 2012
25 Places You Didn't Know Were Dirty and How to Clean Them
I can't craft and I can't cook with a smile if my house is dirty. I grew up in a house where my mom threatened us with the "white glove test" which meant that she would check our work and make sure it was sparkling clean. I also would like to note that I grew up in the sandy desert of Idaho where the wind was always blowing, graciously leaving a nice film of dust everywhere. To this day, I still hate dusting, but that isn't what this post is about!
This is to kick off a new segment called 25 Places You Didn't Know Were Dirty and How to Clean Them!
Based off of years living as an indentured servant in the CLEAN household and my appreciation for that training when I started a cleaning business of my own. My cleaning crew would clean 80 college apartments from top to the grimy bottom in only 9 days! I also cleaned 8 homes each week, and let me tell you...I know a few things about clean.
Well, because I'm so sweet, I'm going to share my tips with you one at a time. I'm not here to overwhelm--instead, I want to inspire. These tasks are simple, but they will make your entire household cleaner, run smoother, and I'm betting make you happy inside too!
25 Places You Didn't Know Were Dirty and How to Clean Them!
Tip #1 The Washing Machine
My mom always says that people forget to clean the stuff that cleans for them.
This is to kick off a new segment called 25 Places You Didn't Know Were Dirty and How to Clean Them!
Based off of years living as an indentured servant in the CLEAN household and my appreciation for that training when I started a cleaning business of my own. My cleaning crew would clean 80 college apartments from top to the grimy bottom in only 9 days! I also cleaned 8 homes each week, and let me tell you...I know a few things about clean.
Would you like to know my secrets?
Well, because I'm so sweet, I'm going to share my tips with you one at a time. I'm not here to overwhelm--instead, I want to inspire. These tasks are simple, but they will make your entire household cleaner, run smoother, and I'm betting make you happy inside too!
25 Places You Didn't Know Were Dirty and How to Clean Them!
Tip #1 The Washing Machine
My mom always says that people forget to clean the stuff that cleans for them.
- Run an empty cycle with bleach.
- Use disinfectant to wipe down outside knobs and handles. Then wipe down the entire inside of washer and agitator.
Wednesday, November 14, 2012
Pie Crust (and an Apple Pie, too!)
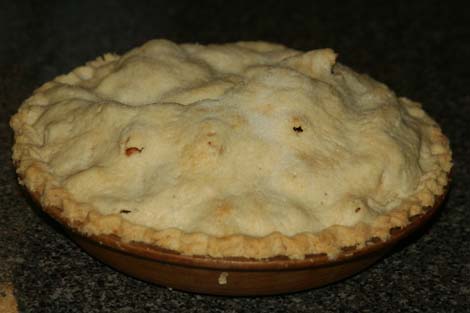
Kate here again with another recipe.
I love the smell of an apple pie baking. It makes your house feel all warm and cozy--and it's easy--even the crust part. Since Thanksgiving is next week, I thought I'd share my super easy pie crust recipe. It's a very basic recipe.
First, you must know that I started out as an awful crust maker. Nothing about my crusts were appetizing. So much so that my husband quickly took over the crust making task. I practiced in secret--okay, okay--he was at work and half the time that was in our unfinished basement furnace room. (The aesthetics were a little lacking considering he is a graphic artist. Maybe the lack of distraction got his creative juices going. But I digress.) I made many, many, horribly awful crusts before I understood not to add too much water. This one principle changed my pie making life. Let's get started.
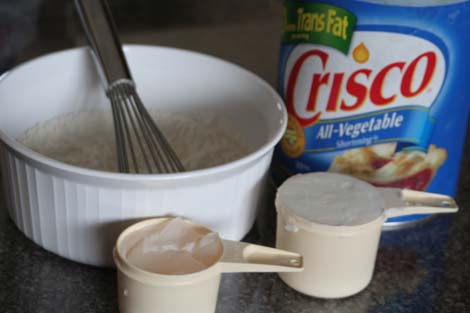 Mix 2 cups flour and a 1/4 tsp. salt together. You'll also need 1 cup of shortening. I like butter flavored if I have it. Today I didn't. (I have tried substituting butter for the shortening with disastrous results--I'll let you know when I figure out a way not to use shortening. But for now . . . )
Then put a couple of ice cubes in a 3/4 cup measuring cup and fill with water.
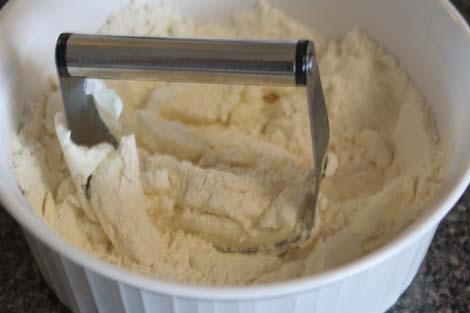 Add the shortening to the flour mixture. Use a pastry blender to combine the flour and shortening. An electric beater works nicely if you don't have a pastry blender. You are trying to turn the flour into flour-shortening crumbs--so keep at it until the shortening and flour mixture are incorporated together.
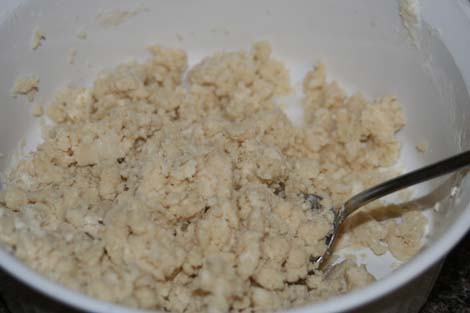 Now slowly drizzle ice-cold water over the mixture as you stir it with a spoon. Go easy on the water.
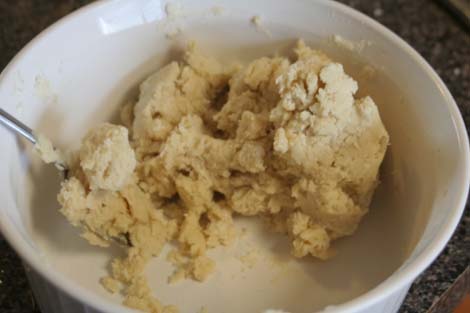 This is done. I won't add anymore water. Divide the dough in half.
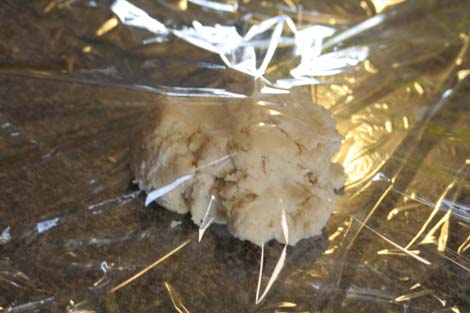 Place half the dough between two sheets of plastic wrap and roll out quite thin.
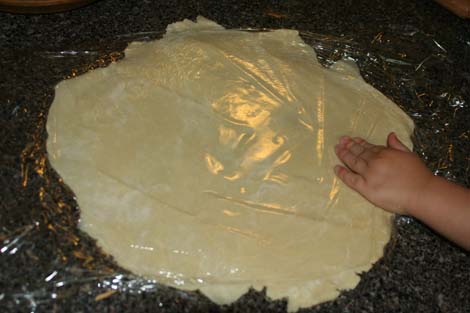 Peel back the top layer of plastic wrap. I have all kinds of helpers today owing to the fact that it's 4:30 on a fast Sunday. They're starving! Lift the crust off the counter and carefully flip and place in a pie dish.
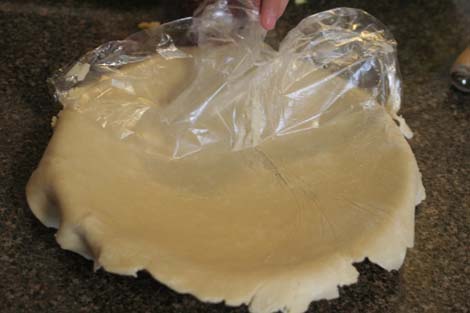
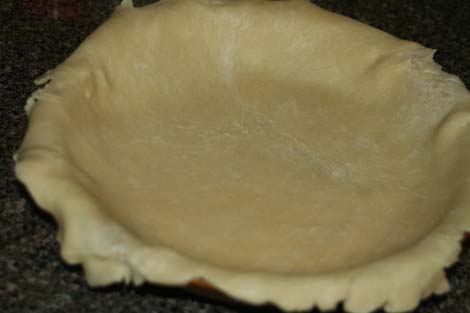
Gently peel off plastic wrap and lift the edges of the pie crust to help it settle into the bottom of the pie plate.
 While I made the crust, my girls used the apple peeler, corer, slicer on about 20 very small apples.
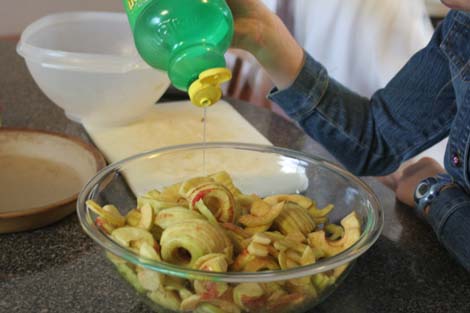 We've gone through all of our tart apples and are now left with these sweet things. Here is the key to using sweet apples in apple pie: lemon juice--and lots of it. Don't be shy about it.
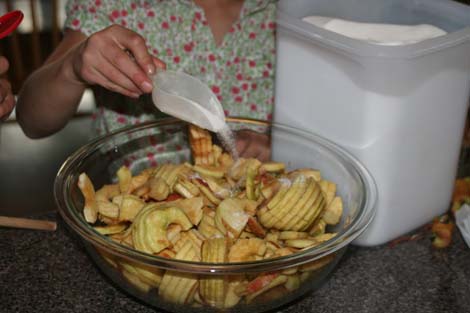 Stir in some sugar. How much is up to you, but I'll post a range at the end for anyone who's nervous without specifics.
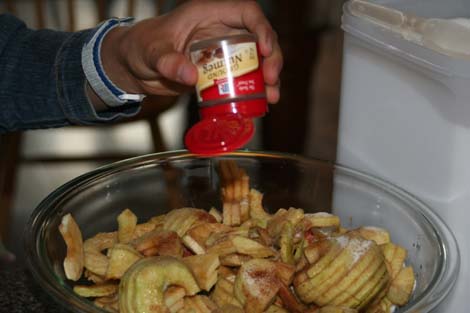 Add some nutmeg and...
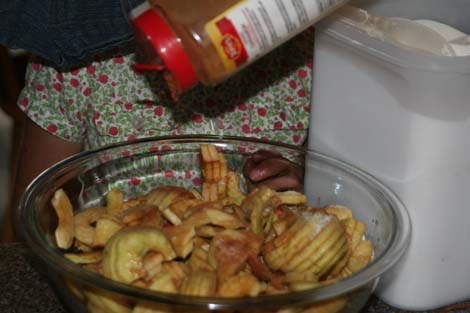 some cinnamon, and...
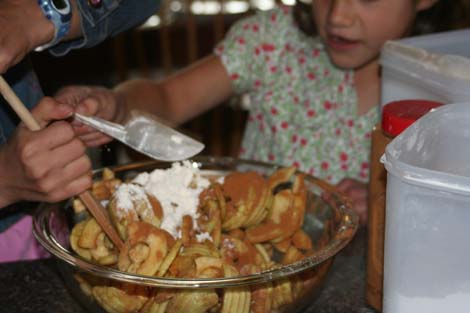 some flour. Stir and taste it.
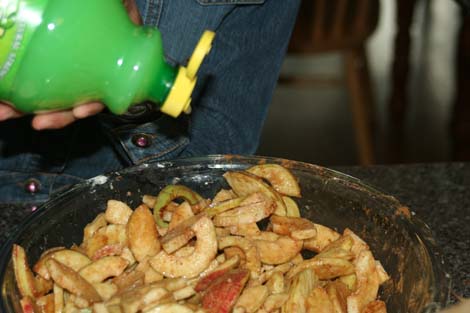 It was still too sweet so we added more lemon juice...sure wish we had some Elstar apples left.
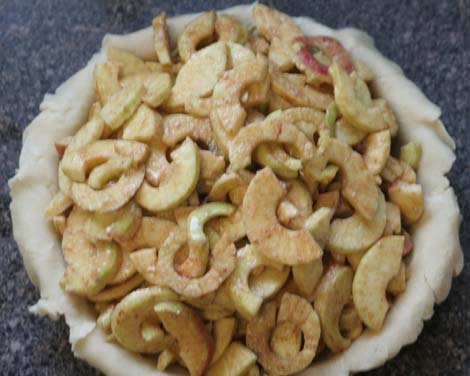 Pour apples into waiting pie crust. Turns out 20 small apples was a few too many. No problem, the starving helpers finished off the leftovers before I finished the crust. Fast Sundays, with church ending at 4:00 and a Mom insisting we make dessert first so that maybe Dad will be home to join us for dinner when we sit down to eat, will do that to munchkins.
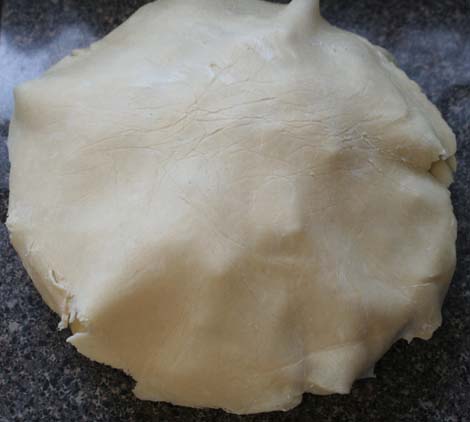 Roll out the second half of dough in the same manner. Place the crust on top of the apples.
 Hold the pie plate in waiter-serving fashion with the hand that you don't write with. Use the back of a table knife to cut the two layers of crust even with the pie pan.
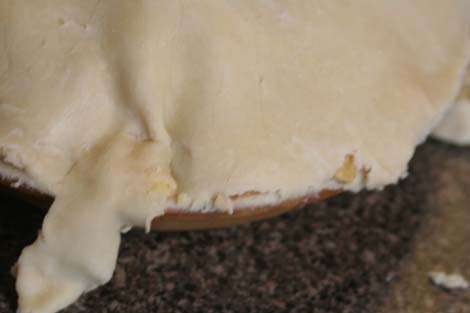 You may have noticed the hole in the previous picture where the crusts didn't quite meet. This is not a time for panic. Pick up a piece of the crust you just cut off and place it over the hole like so. You'll see that I have two such places to mend. Pat the extra piece into place and trim the excess.
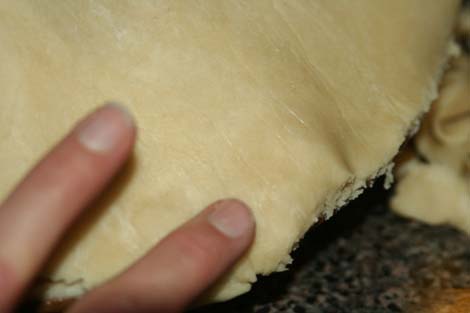 Gently tap the crust until you can't see the mending line. (Or it's very faint.)
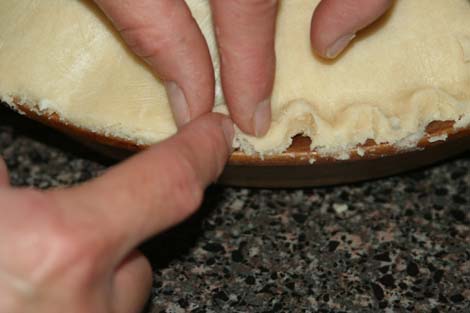 There are a couple of ways to seal your two crusts together. This method is fast and easy. Check cookbooks for other methods. Pinch the crust all the way around.
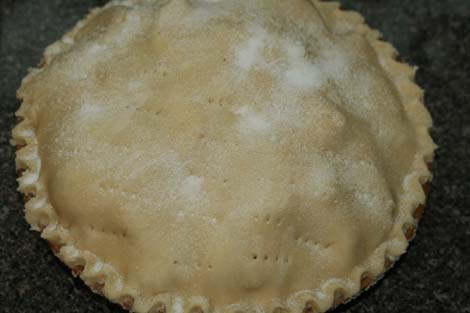 Poke the crust with a fork at regular intervals. This allows the steam to vent. Sometimes Nate will cut out cool designs in the top of the crust because he's pretty talented, but I just use a fork. Sprinkle with a good coating of sugar and bake. See, it's not so bad. Now you can eat dinner while the smell of a baking apple pie fills your house and makes it all warm and cozy.
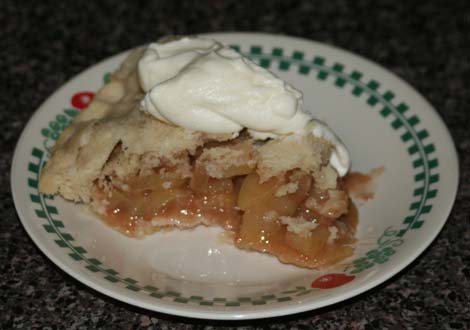 It's best to let your pie set up for and hour or two before you serve it. That never happens at our house. Top with whipped cream and enjoy the taste of fall.
Pie Crust
2 cups flour
1/4 tsp. salt
1 cup shortening
1/2 -3/4 cup ice-cold water
1/4 tsp. salt
1 cup shortening
1/2 -3/4 cup ice-cold water
Mix flour and salt together. Use a pastry blender (or electric beaters) to combine flour and shortening. Slowly add ice-cold water until barely moistened. Makes two pie shells.
Apple Pie
6-8 cups apples, peeled, cored, and thinly sliced
1/2 -3/4 cup sugar
1 T. flour (I increase to 2 T. if I use a lot of lemon juice.)
1/2-3/4 tsp. cinnamon
a sprinkling of nutmeg
1/2 -3/4 cup sugar
1 T. flour (I increase to 2 T. if I use a lot of lemon juice.)
1/2-3/4 tsp. cinnamon
a sprinkling of nutmeg
Combine and stir to coat apples. Pour into pie shell and top with pie crust. Sprinkle with sugar if desired. Bake at 375° for 45-50 minutes. Let cool and top with whipped cream if desired. Enjoy!
(You may want to cover the edges with foil for the first 25 minutes to prevent over browning. I've never had to do that with my stoneware pie dish.)
Kate is the author of The Guy Next Door and can be found at KatrinaPalmer.com or on FB at KatePalmerAuthor.
Subscribe to:
Posts (Atom)


