Happy Birthday!
Hello, Kristie here from Kristie Kreates
and today is my birthday!
I thought it would be appropriate to share
a birthday card and how I made it.
Now to see my finished birthday card,
you'll have to visit my blog,
but I'm going to tell you here how to make it.
The one I made for the tutorial isn't a birthday sentiment, but that's okay.
The one I made for the tutorial isn't a birthday sentiment, but that's okay.
You'll need to start with a piece of card stock
that measures 11" x 4 1/4"
This is a standard 8 1/2"x11" piece of card stock
cut in half the long way.
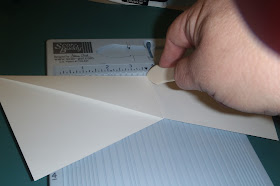
Next you will score from one corner to the opposite corner.
To do this you can use your cutter and line it up like I did above, or you can use ruler or a scoring board.
Use a stylus or bone folder to score.
If you don't have either of these you can use a blunt tip of any kind, try the end of a dinner knife or the outside of a pair of scissors.
Be careful not to use a sharp point,
you don't want to cut the paper, just score it.
Now fold it on the scoreline and make a nice sharp fold.
Next you will score it in the middle and fold on that scoreline.
You now have your basic card and are ready to embellish it with some of your favorite papers.

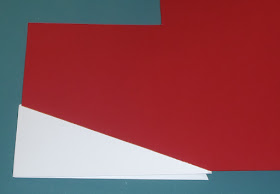
To be sure of a perfect fit, I tuck the paper into the pocket of the card, then turn it over and trace the edges of the card base
like I'm doing below.
Once you have it traced, cut the paper on the lines.
If you want the entire area covered you are good to go,
but I like to have a bit of the white card base showing, so I trim each side down a little bit.
Now adhere it with whatever your favorite adhesive is,
a glue stick worked just fine for me.
Now do the same thing with the paper for the front of the pocket
and the inside of the card.
On the inside, I lay the cut piece on the base and mark on either side of the fold, then cut on these lines before gluing down.
You can leave it in there and just score it, but I find that the card will fold much nicer if there are fewer layers of paper.
This is what the inside of the card will look like once everything is glued down.
For the outside of my card, I stamped
"Thank You" (#17407) from QKR Stampede,
I trimmed it down to the banner shape,
adhered it to red card stock, trimmed it again,
I adhered it to the polka dotted side with glue stick and
to the red side with foam tape.
Using foam tape helps it to lay flat.
The pocket inside is perfect for a gift card,
money or maybe some pictures.
Now if you don't want to fool around with cutting all those pieces,
you can simply use double sided card stock, like I did with this one.

It's quick and easy and really takes very little time this way.
It all depends on the papers you want to use and how much time you want to spend and how fussy you want to be.
I hope you have enjoyed this tutorial.
Leave a comment and let me know what you think,
or if you have any questions.
And be sure to pop over and see my birthday card on my blog
Until next month, Craft On!


Love it! I hope your birthday was fantastic!
ReplyDelete