Pages

Wednesday, May 15, 2013

Dyed rice mosaic

Jasmine from Wayward Girls' Crafts here! I made some dyed rice, but once it was done, I had no idea what to do with it. The first idea didn't really work so I didn't do anything with that. The second idea was a flower. After I drew it on the canvas, I decided to go for it.
I used a jar lid for the center and free handed the petals. I figured the pencil lines wouldn't show since there would be rice covering it.
The first area I decided to cover was the center. I poured some Tacky glue on the circle and spread it out with my finger. I didn't have a paint brush so I used the next best thing ;) I made sure there was a thick enough layer of glue so the rice could settle in it and not fall off easily. Then I poured a handful of rice onto the glue. I tapped the rice down so it stuck to the glue.
After letting it set up for a few seconds, I took the canvas and tipped it so the excess rice would fall off. I poured the excess onto a sheet of paper so I could put the extra rice back in the baggy easily.
Then, I covered the background using the same technique. Instead of filling in the whole petal, I decided to let some white show and give the picture more texture (as if it didn't have any before!) Also, I was just lazy. I only put a thick line of glue on the outline of the petals and added pink. I then added those line thingy things on flowers (technical term, I know.) I used a thicker line of glue and made it slightly more narrow going away from the center. I tapped and tipped again and set it aside to dry.
It didn't take too long to set up and dry. Now it's all ready to find a home somewhere in my apartment!

Wednesday, May 8, 2013

Chicken-Broccoli Pocket Sandwiches


IMG_9331

Kate here again with another recipe. Sorry about last month. I completely forgot. *Facepalm*
So I'm probably one of the last people on earth to hear about these: They're called EasyLunchBoxes and I love them. There is a large, medium, and small section for foods. It makes it really easy to pack fruits and veges. The compartments aren't sealed from each other but the company also sells little sauce containers with lids that fit perfectly into the large and medium compartments. I use mine to send peanut butter for dipping apples, hummus for dipping veges. They're also great for tiny servings of applesauce, yogurt, cottage cheese, mandarin oranges etc.

These sandwiches that I'm showing you today make a weekly appearance in my children's lunch boxes. I bake a large batch every couple of weeks and freeze them. When I want to send one in a lunch, I pull it out of the freezer and place the frozen sandwich in the lunch box. It thaws by lunch time. I've made quite a few different variations from deli meat and cheese to plain cheddar or pepper jack cheese to marinara sauce mozzarella and olives (we didn't like these as well) to the chicken and broccoli pocket you'll see here today.
First, mix up a batch of roll dough. This is the one I use:

9-10 cups flour (can make 5-7 cups whole wheat flour)
2-3 T. dry yeast
3 cups warm water
2/3 cup oil
1/2 cup honey or sugar
4 large eggs
4 tsp. salt

1. Mix 5 cups flour with the yeast. Add water, oil, and honey/sugar.
2. Mix well. About 2 minutes. Turn off mixer and let sponge for 10 minutes.
3. Add salt and 4 eggs. Turn on mixer, and add remaining flour 1 cup at a time until dough just starts to scrape sides of the bowl. This is a soft dough, a little on the sticky side.Knead for 4-5 minutes. This is a soft dough, a little on the sticky side.
4. Normally you would oil your hands and shape this dough into rolls, cover, and let rise until double and light. Then cook at 350° for 18-20 minutes. However, we're going to do something different.
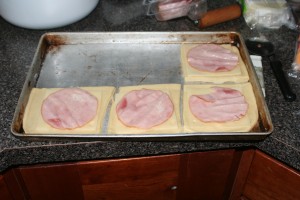
IMG_9314


Divide the dough into 3 sections. Lightly oil 3 cookie sheets. Roll out one section onto a cookie sheet. Use a pizza cutter to cut the dough in half lengthwise and into thirds crosswise. In the picture above, We were making ham and pepper jack sandwiches so we layed a piece of cheese on each section along with a piece of deli ham. But we're going to do something different for the next batch. You will need:
Cream Cheese
Salt & Pepper
Shredded Chicken (I opened a can of chicken, drained it, and shredded it with 2 forks.)
Small pieces of Steamed Broccoli
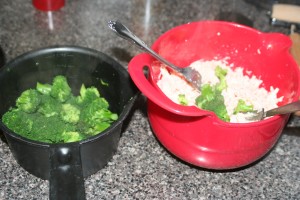
IMG_9324

Combine the broccoli and chicken. Or not. You decide.
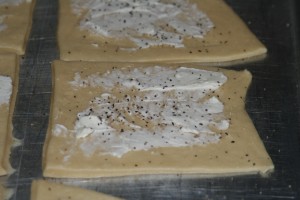
IMG_9330
Spread each section of dough with a little cream cheese. Then sprinkle with salt and pepper.
IMG_9326
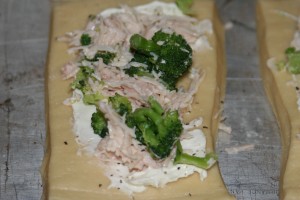
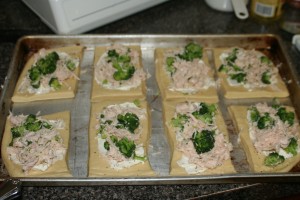
Top with a little chicken and broccoli.
IMG_9325
I divided this pan into 8 sections. I'm not really consistent.
IMG_9327
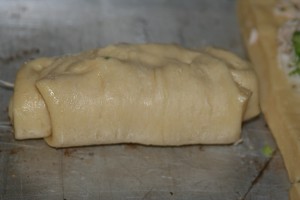
Anyway, now you roll up each section.IMG_9328
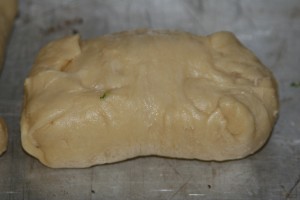
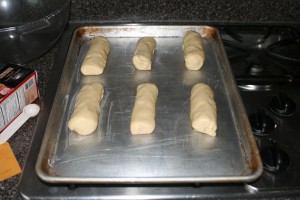
Then tuck the ends under. The oil from the pan makes this a little tricky. Do your best. Turn it over so the tucked ends are against the pan.IMG_9315Now they're ready to go into a 350° oven. You had that preheating, right?
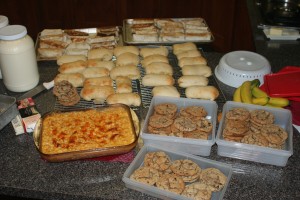
Cook for about 15 minutes. You want them golden brown. Place on a cookie sheet to cool. Then place in gallon ziploc bags and put in the freezer. Easy peasy! Even your children can do it. Mine do. We had a lunch batch cooking night for FHE a few weeks ago. All six children in the kitchen.

IMG_9367
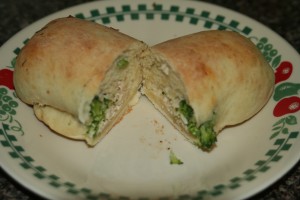
Pretty good results I'd say.
(Burritos, sandwich rolls, and cookies to freeze. Firehouse Macaroni and Cheese to keep in the fridge to be heated up and placed in hot thermoses.)

Wednesday, May 1, 2013

Bakers Twine

Hello blog friends!
Kristie here today from Kristie Kreates.
I can't believe it's May already!
The spring weather has finally come to my part of the country and I'm hoping it will stay now.
But that's a whole other post, it's time we talk about
Baker's Twine.
Baker's Twine is pretty popular in the papercrafting world
and has been for a little while now. 
 It comes in a lot of different colors
and can be used on cards and layouts,
tags and altered projects.
But no matter how many colors I have on hand,
there always seems to be a project that needs a color I don't have.
I have a solution.
I make my own!
Today I'm going to share how to do that with y'all.
You only need a few supplies.
 
Crochet cotton, or any kind of white string.
A ruler, or sometime similar, maybe a paint stir stick.
Sharpie markers or alcohol ink markers
 (Copics, FlexMarkers, whatever brand you prefer)
The first step is to wind the crochet cotton (or string) around the ruler.

When you have the amount you want, be sure it is pushed tightly together.

Using a marker, draw stripes on the string.
Be sure to draw the stripes both ways on the string, 
 go over it a few times so it is good and dark.
  
Here I have used a green alcohol ink marker.
Experiment with how far apart you draw the stripes and see what you like.
 
Here I have used 2 colors. 
You can do whatever you want as far as color, customize away!


Once you are done with the stripes, just unwind it from the ruler.
Now you have customized baker's twine for your projects.

 
For storage, I use a piece of heavy card stock or cardboard.
Just wind it around the card,
cut a slit in the side and secure the end of the twine in the slit.
 
Crochet cotton is pretty inexpensive
and you probably already have some markers that you can use. 
I haven't tried this with any other types of markers,
but I don't see why it wouldn't work
with any kind that you might have,
it's worth a try.
 
Thanks for stopping by. 
I hope this has inspired you to make some of your own baker's twine
 and create something beautiful with it.
I'd love for you to stop by my personal blog
and see what other things I have been creating.
 
Until next month, have fun creating!