CHAPTER 6- Simple Wedding Card Tutorial
 Hello! Kristie here from Kristie Kreates Today I'm going to show you how to make a simple wedding card
Fold a 4¼'' x 11'' piece of white card stock in half to
make a 4¼'' x 5½'' card base.
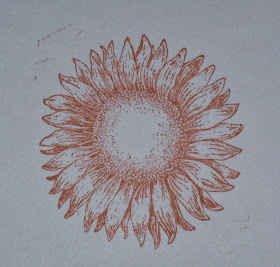
Stamp a flower image on white card stock.
Using scissors or
a shaped punch, cut around the image.
Attach the flower image to the front of
the card,
about 1/3 of the way down
on the left side of the card base, using self-adhesive foam tape.
Using the same color ink as the flower image, stamp a
greeting on white card stock.
Using a medium oval punch or decorative-edged
scissors, cut around the greeting.
Use a large scallop oval punch to create an oval piece from the
same color card stock as the flower image.
Use a large scallop oval punch to create an oval piece from the
same color card stock as the flower image.
I didn't have matching card stock,
so I used the same ink and colored the scalloped oval using a blending tool.
You can also use a make up sponge to do this.
Attach the smaller greeting oval on top of the larger oval,
so I used the same ink and colored the scalloped oval using a blending tool.
You can also use a make up sponge to do this.
Attach the smaller greeting oval on top of the larger oval,
then attach the larger oval to the card front, lower right corner,
using self-adhesive foam tape
using self-adhesive foam tape
If you want to take this one step further, using a blending tool,
or make up sponge, ink the edges of the card base.
This will add a little more color to your card.
It's all a matter of taste.
1. Fold a 4¼’’ x 11’’ piece of white cardstock in half to make a
4¼’’ x 5½’’ card base.
2. Stamp a flower image on white cardstock. Using scissors or a
shaped punch, cut around the image. Attach the flower image to the
front of the card, about 1⁄3 of the way down on the left side of the
card base, using self-adhesive foam dimensional.
3. Using the same color ink as the flower image, stamp a greeting
on white cardstock. Cut out the greeting by using a medium oval
punch or decorative-edged scissors.
4. Use a large scallop oval punch to create an oval piece from the
same color cardstock as the flower image. Attach the smaller greeting
oval on top of the larger oval, then attach the larger oval to the card
front, lower right corner, using self-adhesive foam dimensional.
Courtesy of www.mashedpotatoesandcrafts.com.


No comments:
Post a Comment