Tuesday, July 15, 2014

How to Create Coffee Filter Roses

Today I have step-by-step detailed instructions on how to create beautiful coffee filter roses. Here's a great collage you can pin and be sure to view my companion post on dying the filters!

Coffee Filter Roses Tutorial - Chapter 3


For each rose, gather three four-cup and three eight- to twelve cup
unused basket-style coffee filters. Dye them using watercolors or
watered-down acrylic paint. *I found that food coloring in a bowl of water works the best! Dip and then dry. For a bonus step-by-step post on dying the filters, visit this link http://www.mashedpotatoesandcrafts.com/2014/07/how-to-dye-coffee-filters-to-create.html

Stack the three large filters together. Flatten them out, then fold
in half and in half again to form a triangular wedge.

Using scissors, cut along the open end of the triangle to create a scalloped line.

Do the same with the three small filters.

Open the cut filters and place the small stack on top of the large stack.

With your fingers, pinch the underside of the stack in the center, where the folds meet, which will cause the filters to crinkle together.

Using a stapler, staple just above where your fingers have pulled the filters together.

Turn the flower over and open up the filters. Beginning with the outermost filter, gather the filter at the base and pinch around the base to pull the circle tighter, forming ruffles and petal-like fullness.

Repeat with each of the six filters, gathering them at the base and pinching along the bottom to create a stem-like bump on the bottom.

Wind masking tape around the base to hold the shape.

Fluff out the flower.

Use coffee filter roses as table décor, hang from the backdrops or ceiling, or use them to create floral wreaths.
Courtesy of www.mashedpotatoesandcrafts.com.

Learn more about Diamond Rings Are Deadly Things and all of the chapter tutorials here

Monday, July 14, 2014

How to Dye Coffee Filters to Create Beautiful Roses

I've had a lot of fun helping to create tutorials for the chapter headers in my new book, Diamond Rings Are Deadly Things.
I think that Chapter 3- Coffee Filter Roses is my favorite and I believe my kids would agree.

I'm creating a bonus post to show you the best way to dye your coffee filters in preparation to create roses.
I enlisted the help of four of my five kids and they had a smashing time!


Here's what you'll need to make this project:
Three 8-12 cup style coffee filters for each rose
Three 4 cup style coffee filters for each rose
scissors
masking tape
food coloring


As you can see, a little food coloring goes a long way. My kids were able to dye an entire laundry basket full of filters.
 First put two or three drops of food coloring in a bowl of water. Mix together and you're ready to start dying!
 Take a bunch of three coffee filters together to dye all at the same time.

 Immerse them in the bowl of colored water
 Just wad up the filters in the liquid to coat them in the color of your choice.
 Then squeeze all the water out of the coffee filters by wadding it in a tight ball.
 Flatten out the wet filters and hang to dry.
 This is where a clothesline is super handy because we didn't have to worry about food coloring dripping anywhere in the house.
 The coffee filters dried in less than two hours in the hot summer heat.
 After drying, it's easy to mix and match the filters if you want a multi-colored rose.
 These coffee filter roses are so easy to make. My 8 and 11 year-old-girls made several and the possibilities are endless for your weddings, parties, and more.

Be sure to check out the full step-by-step picture tutorial here
http://www.mashedpotatoesandcrafts.com/2014/07/how-to-create-coffee-filter-roses.html


Learn more about Diamond Rings Are Deadly Things and all of the chapter tutorials here


Guest Book Quilt for Wedding Receptions


Guest Book Quilt- Chapter 4


Prepare or purchase 4-inch quilt squares and place on the wedding
reception entry table.

Invite each guest to share their love by signing
a quilt square with a permanent fabric marker.

Construct a quilt from the signed quilt squares and present it to the married couple as a
special “guest book” that will be both useful and memorable.

Courtesy of www.mashedpotatoesandcrafts.com

Learn more about Diamond Rings Are Deadly Things and all of the chapter tutorials here

Saturday, July 12, 2014

Garden Party Centerpiece


Chapter 16- Garden Party Centerpiece

 
Fill a Mason jar half to three-quarters full of water. 

Add slices of lemon 

and a bouquet of your favorite flowers—try white lilacs,
daisies, freesia, or daffodils for a great contrast. For this example, the bride chose white lilies. Beautiful!

Learn more about Diamond Rings Are Deadly Things and all of the chapter tutorials here

Friday, July 11, 2014

Vintage Hankie Wedding Favors


Vintage Hankie Wedding Favors- Chapter 17
 
This is a fun idea for those weddings and events with a vintage flair.

Collect vintage handkerchiefs in assorted colors.

 Arrange in a basket, on a cake stand, or in a cut-glass bowl with a placard that
reads “For Your Happy Tears!”

Courtesy of www.mashedpotatoesandcrafts.com

Learn more about Diamond Rings Are Deadly Things and all of the chapter tutorials here

Wednesday, July 9, 2014

Creamy Italian Pasta Salad

alltogether
Kate here again with another recipe. I wait all summer for fresh tomatoes and green peppers so I can make this salad. The recipe calls for cherry tomatoes but I prefer chopped fresh tomatoes from my garden. Garden tomatoes have so much more flavor than the grocery store variety. So here's what you'll need:
ingredients
1 cup mayo
2 T. red wine vinegar (It has to be red wine vinegar for the best flavor. White wine and cider vinegars will fall flat. As you can see from the photo, I've grown weary of running out of red wine vinegar and bought a whole gallon this last time.)
1 clove garlic, minced
1 tsp. dried basil
1 tsp. salt
1/4 tsp. pepper
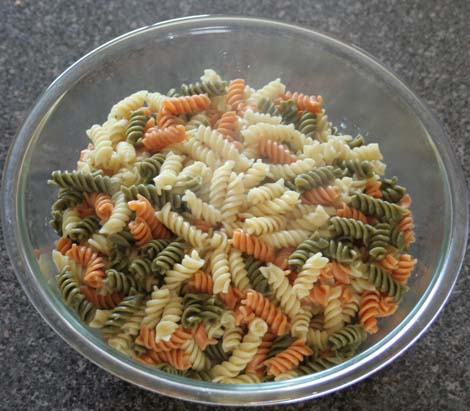
1 1/2 cups twist (Rotini) macaroni, cooked and drained (I prefer the spinach and tomato mix for color.)
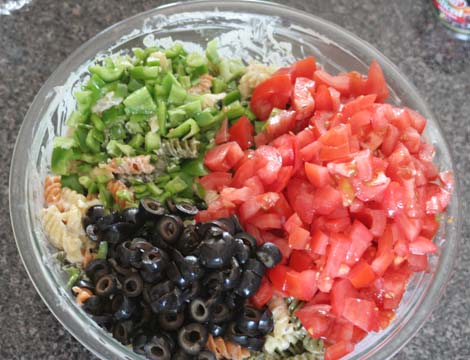
1 cup quartered cherry tomatoes--or some fresh from your garden (Okay, so the ones in the pic aren't from my garden. I was actually going to make it using cherry tomatoes from the grocery store so you could see how it should look. My local grocery store only had two cartons left and the cherry tomatoes were all wrinkly--yuck! Plus, we'd already eaten most of our ripe garden tomatoes that day. These vine-ripened tomatoes were on sale for the same price as romas so I bought them.)
1/2 cup chopped green pepper (The ones in the photo really are from my garden.)
1/2 cup sliced ripe olives (1 small can)
noddles
Cook and drain the pasta according to package directions.
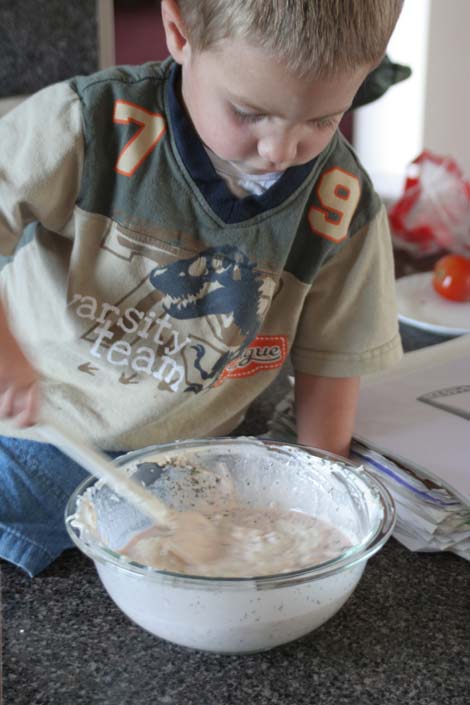
Mix
Then combine the first six ingredients and when your two year-old says, "Mom! Gook!" put him on the counter and let him cook for goodness sakes.
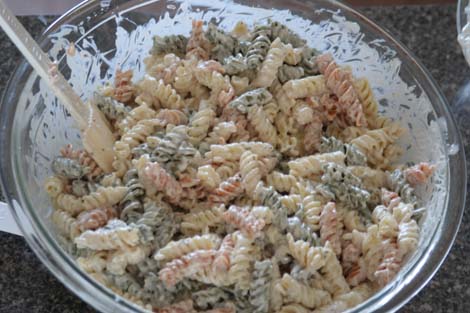
stir
Combine the sauce and noodles.
Add
Chop the vegetables and add to the noodles. Stir together and chill before serving.
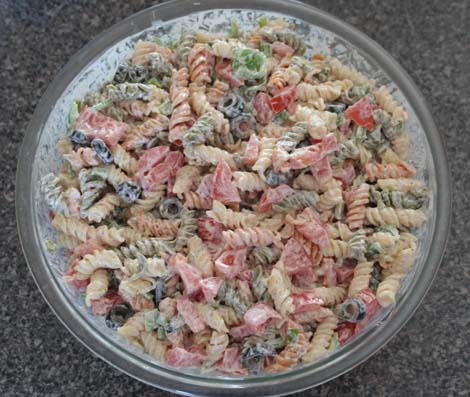
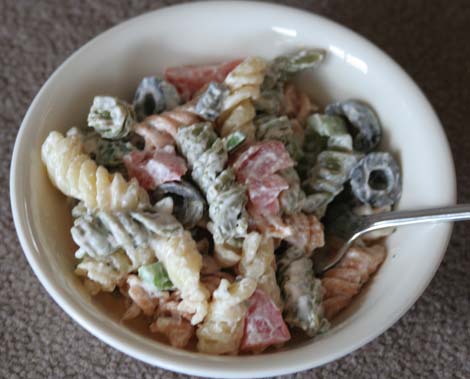
alltogether
And there you have the best-tasting pasta salad with help from your garden peppers and tomatoes.
serveEnjoy! I like to serve it with parmesan bread. Place sliced and buttered bread on a cookie sheet. Sprinkle with parmesan cheese and place under the broiler until very lightly toasted. I ran out of parmesan cheese the day I made this salad so there are no pics of parmesan bread. Use your imagination, or better yet, make some yourself for dinner tonight with this salad.
Creamy Italian Pasta Salad
1 cup mayo
2 T. red wine vinegar (It has to be red wine vinegar for the best flavor.)
1 clove garlic, minced
1 tsp. dried basil
1 tsp. salt
1/4 tsp. pepper
1 1/2 cups twist (Rotini) macaroni, cooked and drained (I prefer the spinach and tomato mix for color.)
1 cup quartered cherry tomatoes--or some fresh from your garden
1/2 cup chopped green pepper
1/2 cup sliced ripe olives (1 small can)
Combine first six ingredients. Stir in remaining ingredients. Cover, chill. Makes 3 cups.